The kitchen is the heart of the home, and making small changes to this space can have a surprising impact on the overall look, feel, and vibe of your space. For many of us, however, the idea of a kitchen renovation is the stuff of nightmares–including inches of dust, weeks of mess, and a hefty invoice at the end of the process.
The good news is that you can transform your kitchen for a fraction of the cost and stress. All you need to do is paint your cabinet doors!
In this guide, we'll show you how to decorate cabinet doors using a sprayer for an even, smooth finish and transform tired surfaces into your new dream home aesthetic.
Remove the Doors
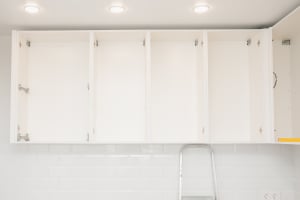
The first step is to remove the cabinet doors completely; this is the easiest way to ensure that you get a smooth, even finish. It will also reduce the need to bend and twist your arm awkwardly as you try to get that last spot.
While it can be tempting to simply spray your doors while they’re still attached to the cabinet frame, this will typically lead to more mess, and a less smooth finish. It is also useful to remove the handles at this stage–soak them in warm water and soap until you are ready to reattach.
Choose Your Paint
The next step is to choose your preferred paint. This will depend largely on what you want the final result to look like.
Consider elements such as the shape and size of your kitchen, how much natural light it gets, and the colors and designs of your white goods and other accessories. Also, make sure you opt for a shade which fits in with your aesthetic perfectly.
Clean and Prime the Doors
Before you go in with your sprayer, make sure that you have a clean surface to work on. Wipe down the cabinet doors with hot, soapy water to remove any grime and grease, and use sandpaper to even out any rough edges or sections; this can cause the paint to catch and can result in an uneven surface.
If desired, you can also use this opportunity to prime the doors using primer. Primer can help the paint adhere more effectively, particularly in areas of potentially high humidity such as the kitchen, and can result in a better finish when painting veneer kitchen cupboard doors. If you choose to prime, simply paint the product on with a paintbrush, and leave to dry before proceeding to the next step.
Fill Your Sprayer
Once your doors are prepped and dried, fill up your sprayer with paint. Always check the instructions for your specific sprayer before you start, as some models may require you to dilute the paint slightly before starting, or else you might run the risk of clogging the nozzle.
Start Painting
When you begin spraying, hold the sprayer a good distance from the surface, but close enough that you can move smoothly. For best results, start in the top left hand corner and move across horizontally.
When you reach the end, move the sprayer down, and then move back across in the opposite direction to create lines of paint, and ensure that you have covered the surface evenly. Allow the paint to dry, and then repeat with another coat if necessary.
Seal and Finish
Kitchens can be hard on paint, so it is a good idea to invest in some type of sealant or finish to prevent your new cabinets from chipping or peeling. As with the primer, you can simply paint this on and allow it to dry completely.
Reattach Handles and Rehang
Once everything is totally dry–this may need an overnight period to be totally ready–reattach your handles, and rehang the cabinets in their positions.
Wrapping Up
With our simple guide, you will have your dream kitchen in no time! Of course, for those who aren’t up for the challenge of a DIY project, 27estore has a wide array of pre-painted cabinet doors. Check out our selection today!


