How to Install Wall Panels Without Adhesive: A Quick and Easy Guide

Wall panels are a versatile choice for interior wall covering due to their ease of installation and cost-effectiveness. Priced between $18 and $45 per square foot, these panels offer a stylish alternative to traditional drywall. Installing wall panels without adhesive ensures longevity and stability. If you're planning a project in Nevada, check out our full range of wall panels in Las Vegas to find high-quality materials that suit your vision and budget.
Begin by measuring your walls and cutting the panels to fit using tools like a circular saw or electric jigsaw. Secure the panels with nails or screws for a durable finish, whether over wood or drywall surfaces. This method not only enhances your space aesthetically but also allows for easy removal or repositioning in the future.
Plus, because these are easy to install, you can cut down on professional installation costs. On that note, we will share a step-by-step guide on how to install wall panels (like our wood veneer for walls) without adhesive. Let’s dive in!
What Are Wall Panels?
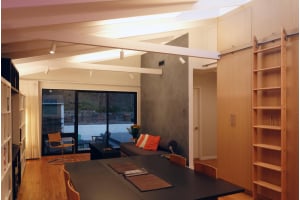
A wall panel is a square piece of veneer, wood, metal, or plastic that you can use to cover walls. When multiple wall panels are combined, they offer an interesting and aesthetic alternative to drywall.
Now, there are different types of wall panels in terms of material, design, and price. For example, there are horizontal wall covers and vertical wall covers; they can also vary in size, textures, and color combinations.
Transform Your Space with Our Stylish Wall Panels!
High-quality panels that add elegance to any room.
How to Install Panels Without Adhesive
Installing wall panels with adhesive can be easy, but it's not long-lasting because the glue wears off over time. This is why installing the panels without adhesive is a good idea–it takes a bit longer to install them this way, but it's worth the effort.
Step One: Measuring and Shopping
The first step to installing wall panels is to measure your wall and determine its square footage. You can do that simply by multiplying the height of the wall by its length. Make sure you subtract the area of any doors and windows.
The square footage of your wall will help you determine the amount of wall panels you need. Note that wall panels come in large sheets and you will have to cut them into smaller pieces manually. You can get them cut by a carpenter, but that will cost you some extra bucks, so we don't advise you to do so unless you're short on both time and experience.
Step Two: Cutting the Panels
Once you've brought the sheets home, put them against the walls and check if they are the right size. If they roughly seem the right size, it's time to start cutting so you can adjust them to the shape of your wall.
First, use a pencil or a marker to outline your cutting marks. Next, arrange any of the following cutting tools:
- Electric jigsaw
- Junior hacksaw
- Circular saw
- Table saw
- Handheld saw
- Scissors
- Clippers
Notice that although it's easy to cut these sheets, it's a good idea to practice your cutting skills on a rough sheet. Slight imbalances while cutting won't show, but if you fail to cut symmetrically, the wall panels will be difficult to fix.
Experts recommend using a circular saw with electric brake cuts, as this tool is lightweight and easy to handle–you can maneuver it easily and learn to handle it like a pro in no time. Overall, the cutting process should take you between two and five hours.
Step 3: Nailing or Screwing the Panels
This is the most effort-demanding step. You'll need a hammer and nails if you wish to fix the panels on a wood wall. But if you wish to fix them on drywall, you will need screws.
Wear proper protective gear and make sure you clean the walls before nailing or screwing your panels to the wall.
Custom Wall Panels, Sized to Fit Your Space
Quickly input your dimensions and get a quote for the panels you need — fast and simple.
FAQs
Should I Opt for Nail or Glue Paneling?
It depends on your goals. If you want to save time and want a quick, temporary solution, it's best to go with glue paneling, but if you want the wall panels to stay in their place for as long as you want, nail them!
Can I Install Wall Panels Over Drywall?
Yes, you can! However, keep in mind that when you place wall panels over drywall, the walls will become thicker. This might be a problem if you’re short on space.
Wondering if you can paint wall panels? Check out our latest post!
Add Modern Elegance with Our Slatwall Panels!
Bring Texture and Depth to Your Walls!


-

-
-
-
High Gloss Polyester Melange Dark Wall PanelSpecial Price $25.50 Regular Price $31.00
-
High Gloss Polyester Melange Light Wall PanelSpecial Price $25.50 Regular Price $31.00
-
-
-
-
High Gloss Polyester Graphite Pearl Wall PanelSpecial Price $25.50 Regular Price $34.00
-
High Gloss Polyester Almond Cream Pearl Wall PanelSpecial Price $25.50 Regular Price $34.00