How to Build a Door With Glass Panels: A Step-by-Step Guide
It takes anywhere between thirty minutes and twelve hours to build an interior door with glass. The amount of exact time depends on your do-it-yourself-skill level, the complexity of your door’s design, and the materials you choose.
Whether you're a seasoned craftsman or a complete beginner, there are many reasons why doors have glass panels, and this step-by-step guide will provide you with actionable advice on how to build a beautiful glass panel door that will brighten and add a touch of sophistication to your home.
Step 1: Gather Supplies
First, gather the following materials and tools:
- Wooden door frame
- Glass panels of your choice
- Measuring tape
- Saw
- Sandpaper
- Adhesive or clips
- Sealant or putty
- Paint or stain
- Door hardware (handles, locks, hinges)
When choosing glass panels, be mindful of the durability, aesthetics, transparency, and size you require. You also have the option of either transparent or translucent glass, so choose the one that best meets your needs and preferences.
Step 2: Plan and Design
Next, sketch the door’s design on a piece of paper and use the measuring tape to accurately measure the dimensions of the door frame.
Pay close attention to the dimensions of the door frame's rails (horizontal pieces), stiles (vertical pieces), central panel area, and the desired spacing between glass panels. These measurements will serve as the foundation for your glass panel calculations. Once you have the door frame dimensions, you can calculate the precise size of each glass panel you need.
Step 3: Cutting and Preparing
Now, cut the wooden door frame. Each wood panel should have a straight edge, conforming to the measurements you took earlier. You might need to cut the glass panels, but make sure each is free from scratches or smudges when you are done.
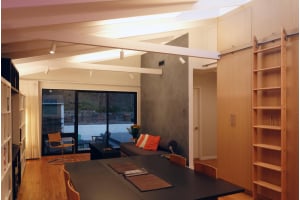
Style Meets Function in Every Door We Offer!
Choose from a variety of designs that complement your home.
We recommend using sandpaper to gently smooth the edges of the glass panels. This will eliminate sharp corners, ensure safety, and bring about a polished finish.
Step 4: Assemble the Door
It’s time to put the puzzle pieces together. Assemble the wood and glass as per the design you created. There are various ways to glue glass to the wooden door frame, but the top two ways recommended by experts are as follows:
- Use glass adhesive as per the manufacturer’s guidelines.
- Use spline joints and dry-fit the glass panels.
In both cases, you need to pay close attention to the alignment of the glass.
Apart from glass panels, you also want to assemble the other door components (e.g., rails, stiles, mullions, muntins, panels, reinforcements, and weatherstripping), too.
Step 5: Sealing and Finishing
After securely attaching the glass panels, finish off the door by applying a high-quality sealant or putty around their edges. This creates a watertight seal and enhances the door's insulation. It also protects it from moisture damage.
Next, you can choose to paint a door with glass panels or stain the wooden frame to coordinate with your decor. Install door hardware, such as handles, locks, and hinges. These final touches not only contribute to the door's functionality but also define its overall aesthetic appeal.
Step 6: Installation
Finish off the process by removing the old door. First, remove its hinges and then take it out of the frame carefully to avoid damaging the frame.
Once removed, hang your newly crafted glass panel door in place. You might need to make a few precise adjustments to ensure the door fits securely and operates smoothly.
In Conclusion
If you prefer to purchase ready-made doors than to make your own glass-paneled doors, take a look at what 27estore has to offer. We carry an extensive array of unique products for any home improvement project that can be bought off the shelf or customized to your specific needs!